Opni Agent Installation
There are two ways to install Opni agent. We recommend installation through the Rancher UI.
- Installation using Rancher UI
- Installation using Helm
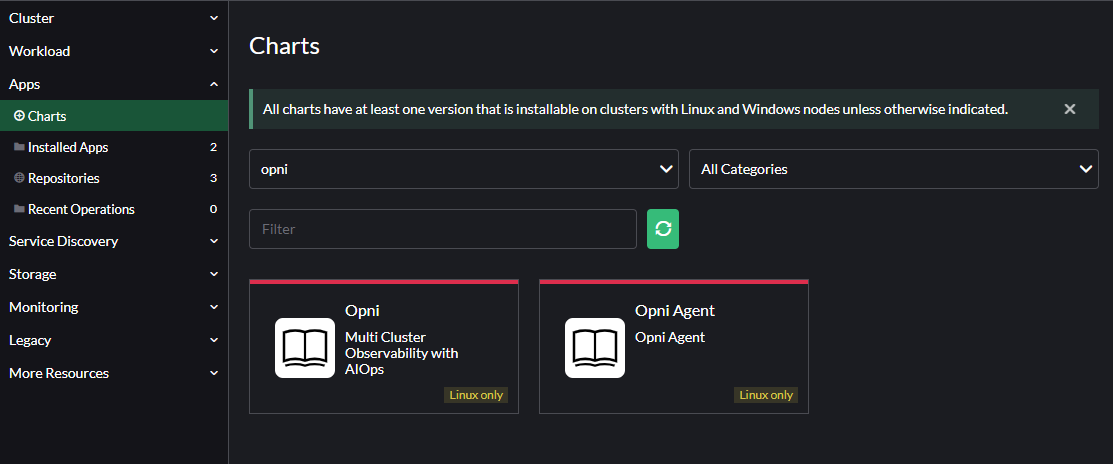
Enter the following git url:
https://github.com/rancher/opni.git
And the following branch:
charts-repo
Once the repo has updated you should be able to find Opni in the list of charts.

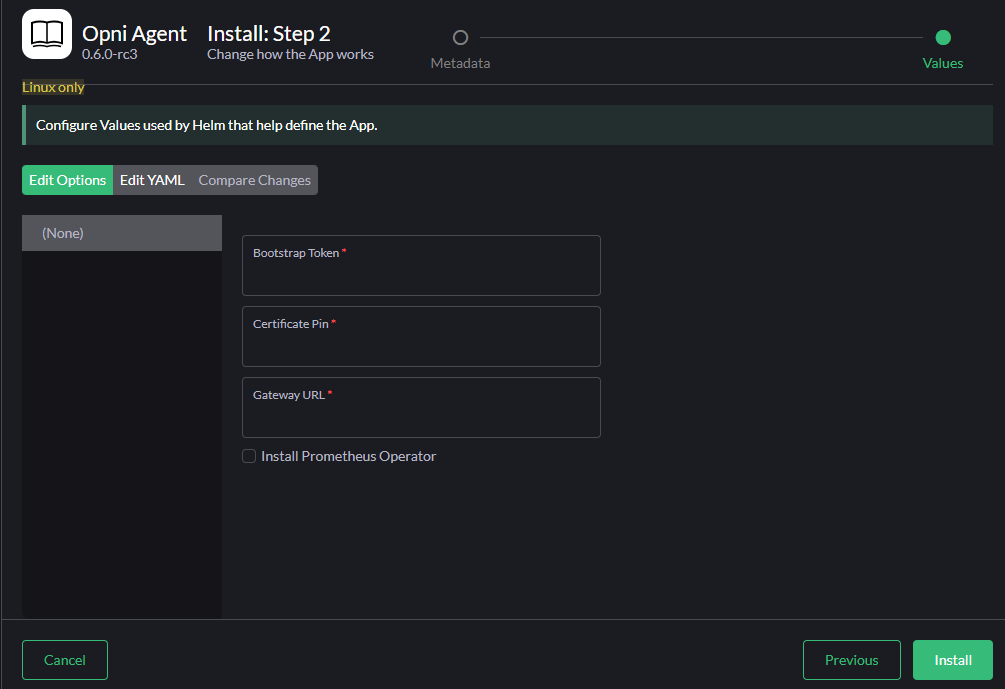
To install the Opni Agent fill in the three required fields:

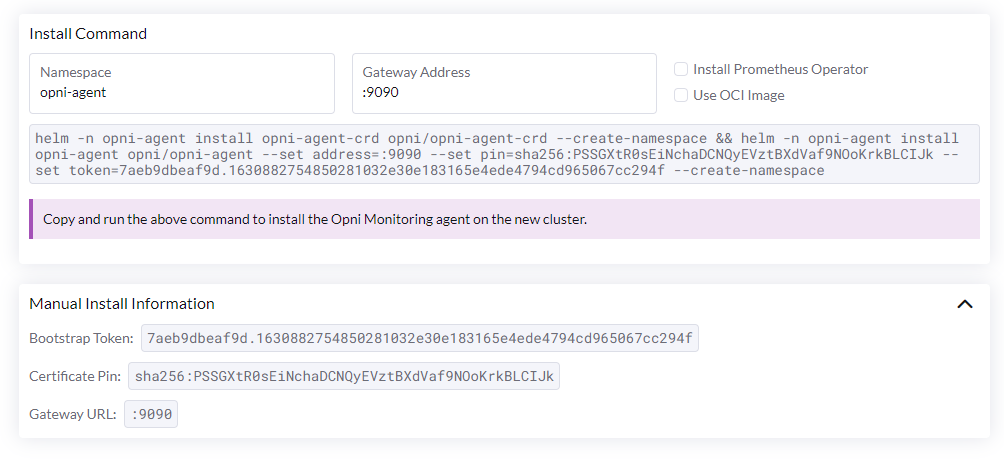
These can be obtained from the Opni Management UI. Under cluster select Add Cluster and in the following screen expand the Manual Install Information section

These fields map directly to the fields in the chart install UI.
Agents can be installed on any Kubernetes cluster using the Agent Helm chart.
Using the Opni Dashboard
Follow these steps to install an agent into a new cluster using the Opni dashboard:
Navigate to the Opni dashboard.
To access the dashboard, you can port-forward:
kubectl -n opni port-forward svc/opni-admin-dashboard web:webThen navigate to http://localhost:12080.
Select "Clusters" from the left sidebar, then click "Add Cluster".
 note
noteOn a new installation, you will see the Opni cluster itself listed here.
On the next screen, adjust the install command settings as needed depending on your environment, then copy the command shown here.
 tip
tipIf you don't have Prometheus Operator installed on the cluster you want to add, check the "Install Prometheus Operator" box. If you already have Prometheus Operator installed, it must be version
v0.53.0or newer.Paste the command into a terminal where your kubeconfig is configured with the cluster you want to add.
After a few seconds, you should see the following banner appear. Clicking "Finish" will return you to the Clusters page.
Using the CLI
You can obtain the bootstrap token and pin required to add a cluster using the CLI.
To obtain the pin, run the following command:
opni certs pinThis will print the pin to the console. For example:
sha256:gLjgLJ_liSopFKFXyniSOinasiTfww7dp2YlAWIfhEMThe pin is not a secret (it is the hash of a public key), and will stay the same. The
sha256:prefix is part of the pin.More details on the gateway's certificate chain can be shown using the
opni certs infocommand:SUBJECT
ISSUER CN=opni-gateway-ca
IS CA false
NOT BEFORE 2022-10-19T00:17:07Z
NOT AFTER 2023-01-17T00:17:07Z
FINGERPRINT sha256:GMTuaNlcNBb32nVf3maB_yj1BFJLsjNPrTUzuyrn3Ho
-----------------------------------------------------------------
SUBJECT CN=opni-gateway-ca
ISSUER CN=opni-gateway-ca
IS CA true
NOT BEFORE 2022-10-19T00:17:01Z
NOT AFTER 2023-01-17T00:17:01Z
FINGERPRINT sha256:gLjgLJ_liSopFKFXyniSOinasiTfww7dp2YlAWIfhEMTo create a new bootstrap token, run the following command:
opni token createThis will create a new token and print its details to the console.
ID            TOKEN                                                              TTL   USAGES  LABELS
753360e55f2c  753360e55f2c.36f593574cdf60e73a10d29b81280cbb530043a664cf7243b37f  5m0s       0
The token is a secret, but it will expire after a specified duration, and can be revoked at any time. Use the
opni token listcommand to view all tokens, their expiration dates, and usage counts.