Quick Start using Rancher Desktop
This guide walks you through installation of Opni on Rancher Desktop, an open-sourced desktop application for Linux, MacOS and Windows. In 10 mins, you will have Opni deployed on a local k3s cluster.
Prerequisites
- Rancher Desktop is installed and configured on your machine.
Install Rancher Desktop on your computer
Follow the official documentation to install Rancher Desktop. Once installed, it creates a local k3s cluster on your machine and installs the command line tools you need to deploy apps to it (kubectl/nerdctl/helm).
Make sure to switch k8s context to the local k3s cluster in Rancher Desktop
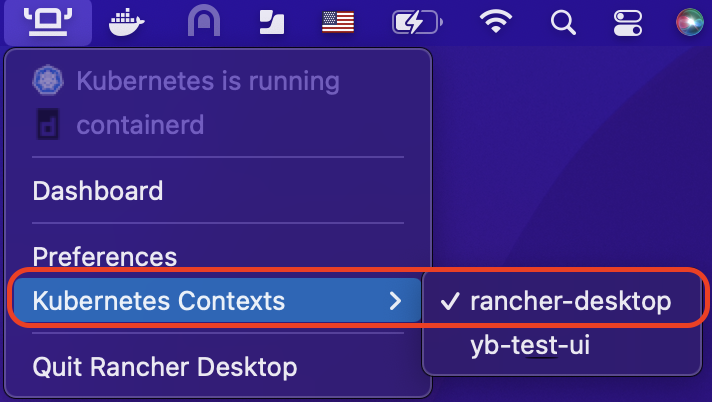
and validate it

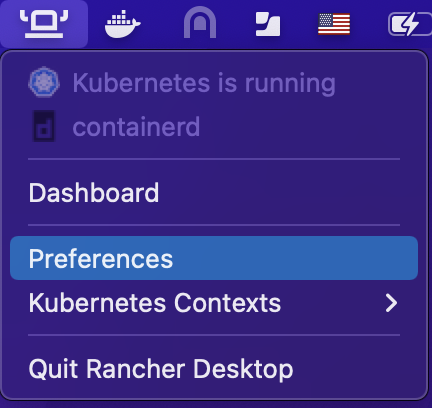
Configure Rancher Desktop
Allocate enough resource to the local k3s cluster. Opni requires 8 CPUs and 8GB Memory at a minimum.

Install Opni
Here is an example of using Helm to install Opni. For more details please refer to here
1. Install cert-manager
kubectl apply -f https://github.com/cert-manager/cert-manager/releases/download/v1.10.0/cert-manager.yaml
2. config chart value. Select noauth as auth provider and input your hostname and grafana.hostname.
This is a sample values.yaml file:
gateway:
  # Set a hostname for the Opni Gateway API. This must be accessible to all agents.
  hostname: <your-hostname> # required
  auth:
    # Set an auth provider. Available options are "openid" and "noauth".
    provider: "noauth"

    # If using the "openid" provider:
    openid:
      # discovery and wellKnownConfiguration are mutually exclusive.
      # If the OP (openid provider) has a discovery endpoint, it should be
      # configured in the discovery field, otherwise the well-known configuration
      # fields can be set manually. If set, required fields are listed below.
      discovery:
        # Relative path at which to find the openid configuration.
        # Defaults to "/.well-known/openid-configuration".
        path: "/.well-known/openid-configuration"

        # The OP's Issuer identifier. This must exactly match the issuer URL
        # obtained from the discovery endpoint, and will match the `iss' claim
        # in the ID Tokens issued by the OP.
        issuer: ""  # required

      # The ID Token claim that will be used to identify users ("sub", "email", etc.).
      # The value of this field will be matched against role binding subject names.
      # Defaults to "sub".
      identifyingClaim: "sub"

      clientID: ""  # required
      clientSecret: ""  # required

      # OAuth scopes that will be requested by the client. Defaults to ["openid", "profile", "email"].
      scopes: ["openid", "profile", "email"]

      # https://grafana.com/docs/grafana/v9.0/setup-grafana/configure-security/configure-authentication/generic-oauth/#roles
      roleAttributePath: # required

      # Optional manually-provided discovery information. Mutually exclusive with
      # the discovery field (see above). If set, required fields are listed below.
      wellKnownConfiguration:
        issuer: ""                  # required
        authorization_endpoint: ""  # required
        token_endpoint: ""          # required
        userinfo_endpoint: ""       # required
        jwks_uri: ""                # required
        # revocation_endpoint: ""
        # scopes_supported: []
        # response_types_supported: []
        # response_modes_supported: []
        # id_token_signing_alg_values_supported: []
        # token_endpoint_auth_methods_supported: []
        # claims_supported: []
        # request_uri_parameter_supported: false

    # If using the "noauth" provider:
    noauth:
      # Set a hostname where the grafana dashboard will be accessible. This value
      # is the grafana oauth redirect URL for the noauth provider.
      grafanaHostname: <your-grafana-hostname> # required

  opni-agent:
      # Embedded kube-prometheus-stack chart. Only the following components will be installed:
      # - prometheus operator
      # - kube state metrics
      # - node exporter
      # - default service monitors and rules
      kube-prometheus-stack:
      enabled: true

  opni-prometheus-crd:
      # set to false if `opni-agent.kube-prometheus-stack.enabled` is true
      enabled: false
3. Add the Opni Helm repository:
helm repo add opni https://raw.githubusercontent.com/rancher/opni/charts-repo
helm repo update
4. Install the CRDs chart:
helm -n opni install --create-namespace opni-crd opni/opni-crd
5. Install the Opni chart:
helm -n opni install opni opni/opni -f values.yaml
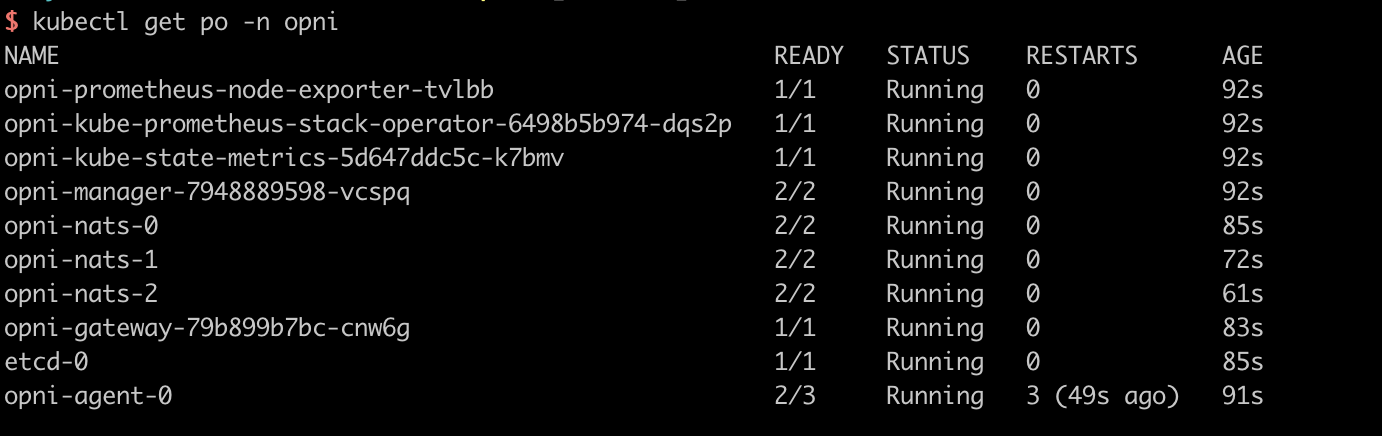
Validate Installation
Run the following command to validate Opni has been installed in namespace Opni