Opni Backends
An observability backend is where observability data is sent for storage and querying. Backends are configured in the Opni Management UI. You can currently create the following backends:
For the best user experience consider using Google-Chrome.
- Opni Monitoring
- Opni Logging
- Opni Alerting
The Monitoring backend is composed of Cortex and Grafana deployments, fully managed by Opni. You can enable and configure Monitoring from the Opni dashboard, or from the CLI.
Using the Opni Dashboard
Follow these steps to enable Monitoring from the Opni dashboard:
- Navigate to the Opni dashboard.
To access the dashboard, you can port-forward:
kubectl -n opni port-forward svc/opni-admin-dashboard web:web
Then navigate to http://localhost:12080.
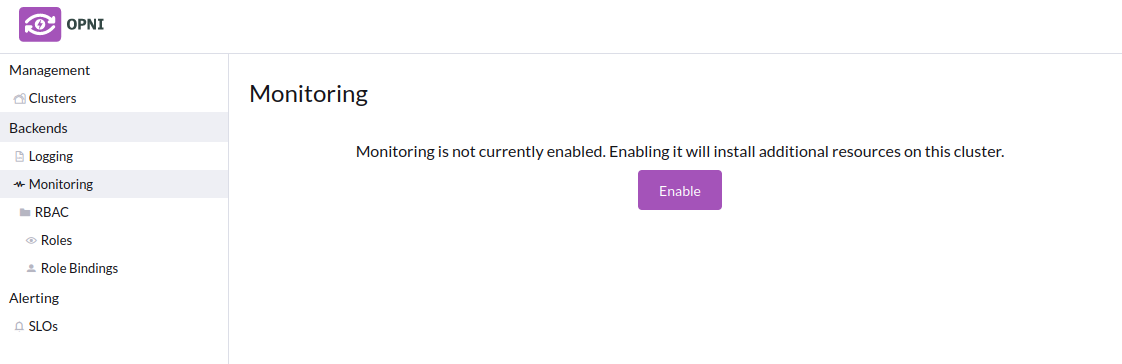
Select "Monitoring" from the left sidebar under "Backends", then click "Enable".
Adjust configuration options as needed:
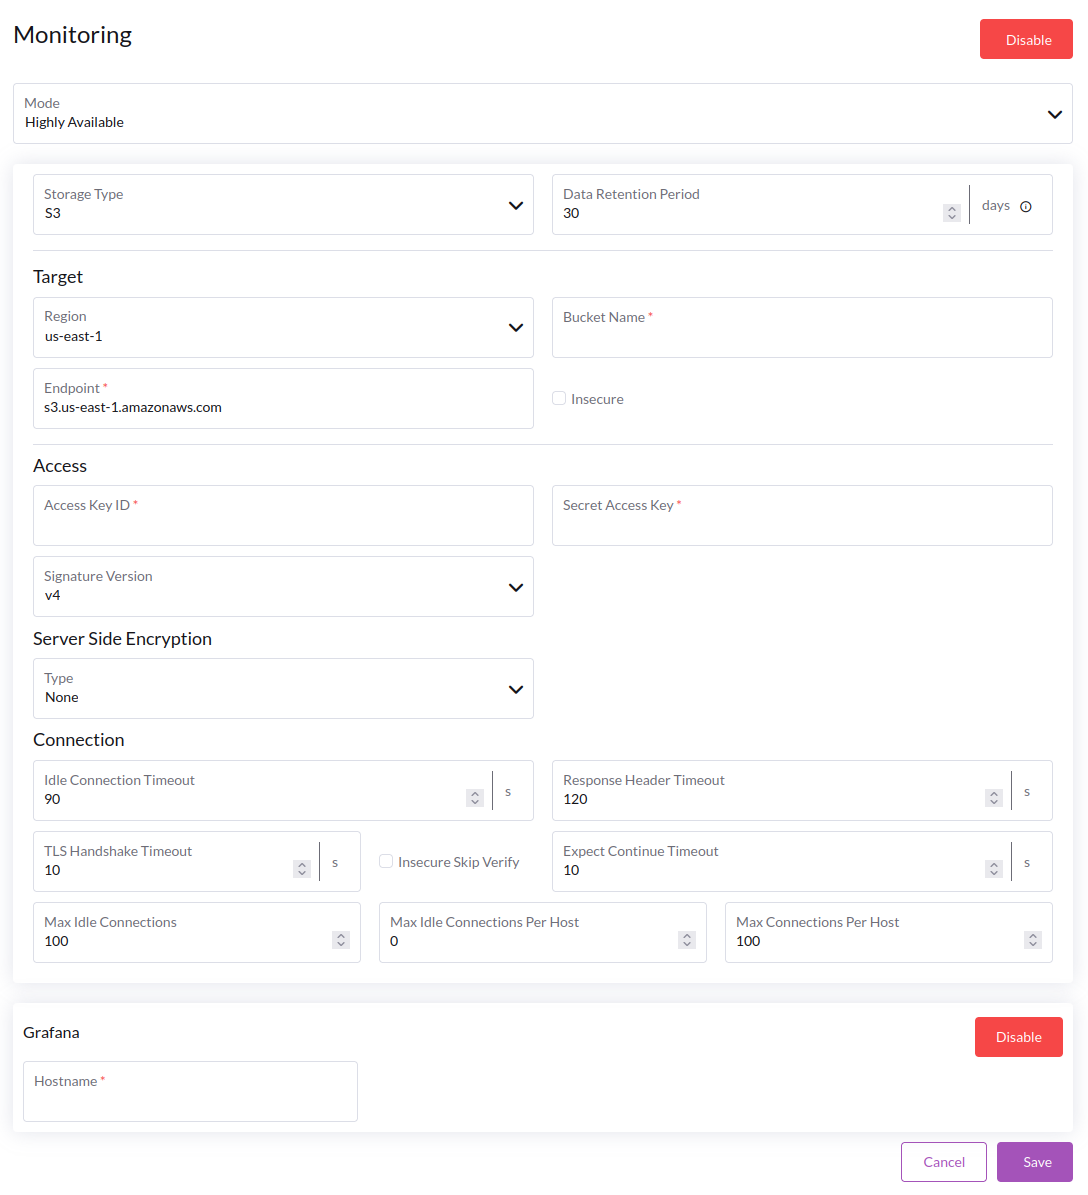
Mode
- **Standalone**: All components of Cortex will be deployed in a single pod. This is suitable for small setups.

- **Highly Available**: Cortex components will be deployed in separate pods and replicated for high availability. This setup can provide better performance and reliability, but requires more resources.
Storage Type
- **S3**: Cortex will store time series data in an S3 bucket. This is the recommended default option.

- **Filesystem**: Cortex will store time series data on the local filesystem using a persistent volume. This option is suitable for testing and demo setups.

:::caution

Filesystem storage may be unreliable, especially during upgrades. Do not rely on this option for production workloads, as data loss is possible.

:::
Data Retention Period
Controls the global retention period for time series data.
Cortex stores historical data in blocks, where each block contains 2 hours worth of data. Blocks are scanned periodically, and any blocks which contain metrics older than the retention period will be deleted.
S3 Options
When S3 storage is selected, the following options are available (required fields will be marked with a <span style={{ color: '#f00' }}>*</span> in the Opni UI):

- **Bucket Name**: The name of the S3 bucket to use for storing time series data. This bucket must already exist.

- **Endpoint**: The S3 endpoint to use. Selecting a region from the dropdown will automatically populate this field with the appropriate AWS S3 endpoint, or a custom endpoint can be provided.

- **Access Key ID**: The access key ID to use for authenticating with S3.

- **Secret Access Key**: The secret access key to use for authenticating with S3.

- **Signature Version**: The signature version to use for authenticating with S3. This should be set to `v4` for AWS S3.

- **Server Side Encryption**: This can be enabled if your S3 bucket is configured to use server side encryption. If `SSE-KMS` is selected, you will be required to provide the KMS Key ID and Encryption Context.

- **Connection**: Various connection options can be specified. The default options are sufficient for most use cases.
Grafana
Grafana can be enabled by clicking "Enable" under the Grafana section. The following configuration options are available:
- **Hostname**: The hostname at which Grafana will be accessed in the browser.

:::info

To access Grafana from a browser, you will need to create a Kubernetes Ingress for the Grafana service. This hostname must match the hostname configured in the ingress.

:::
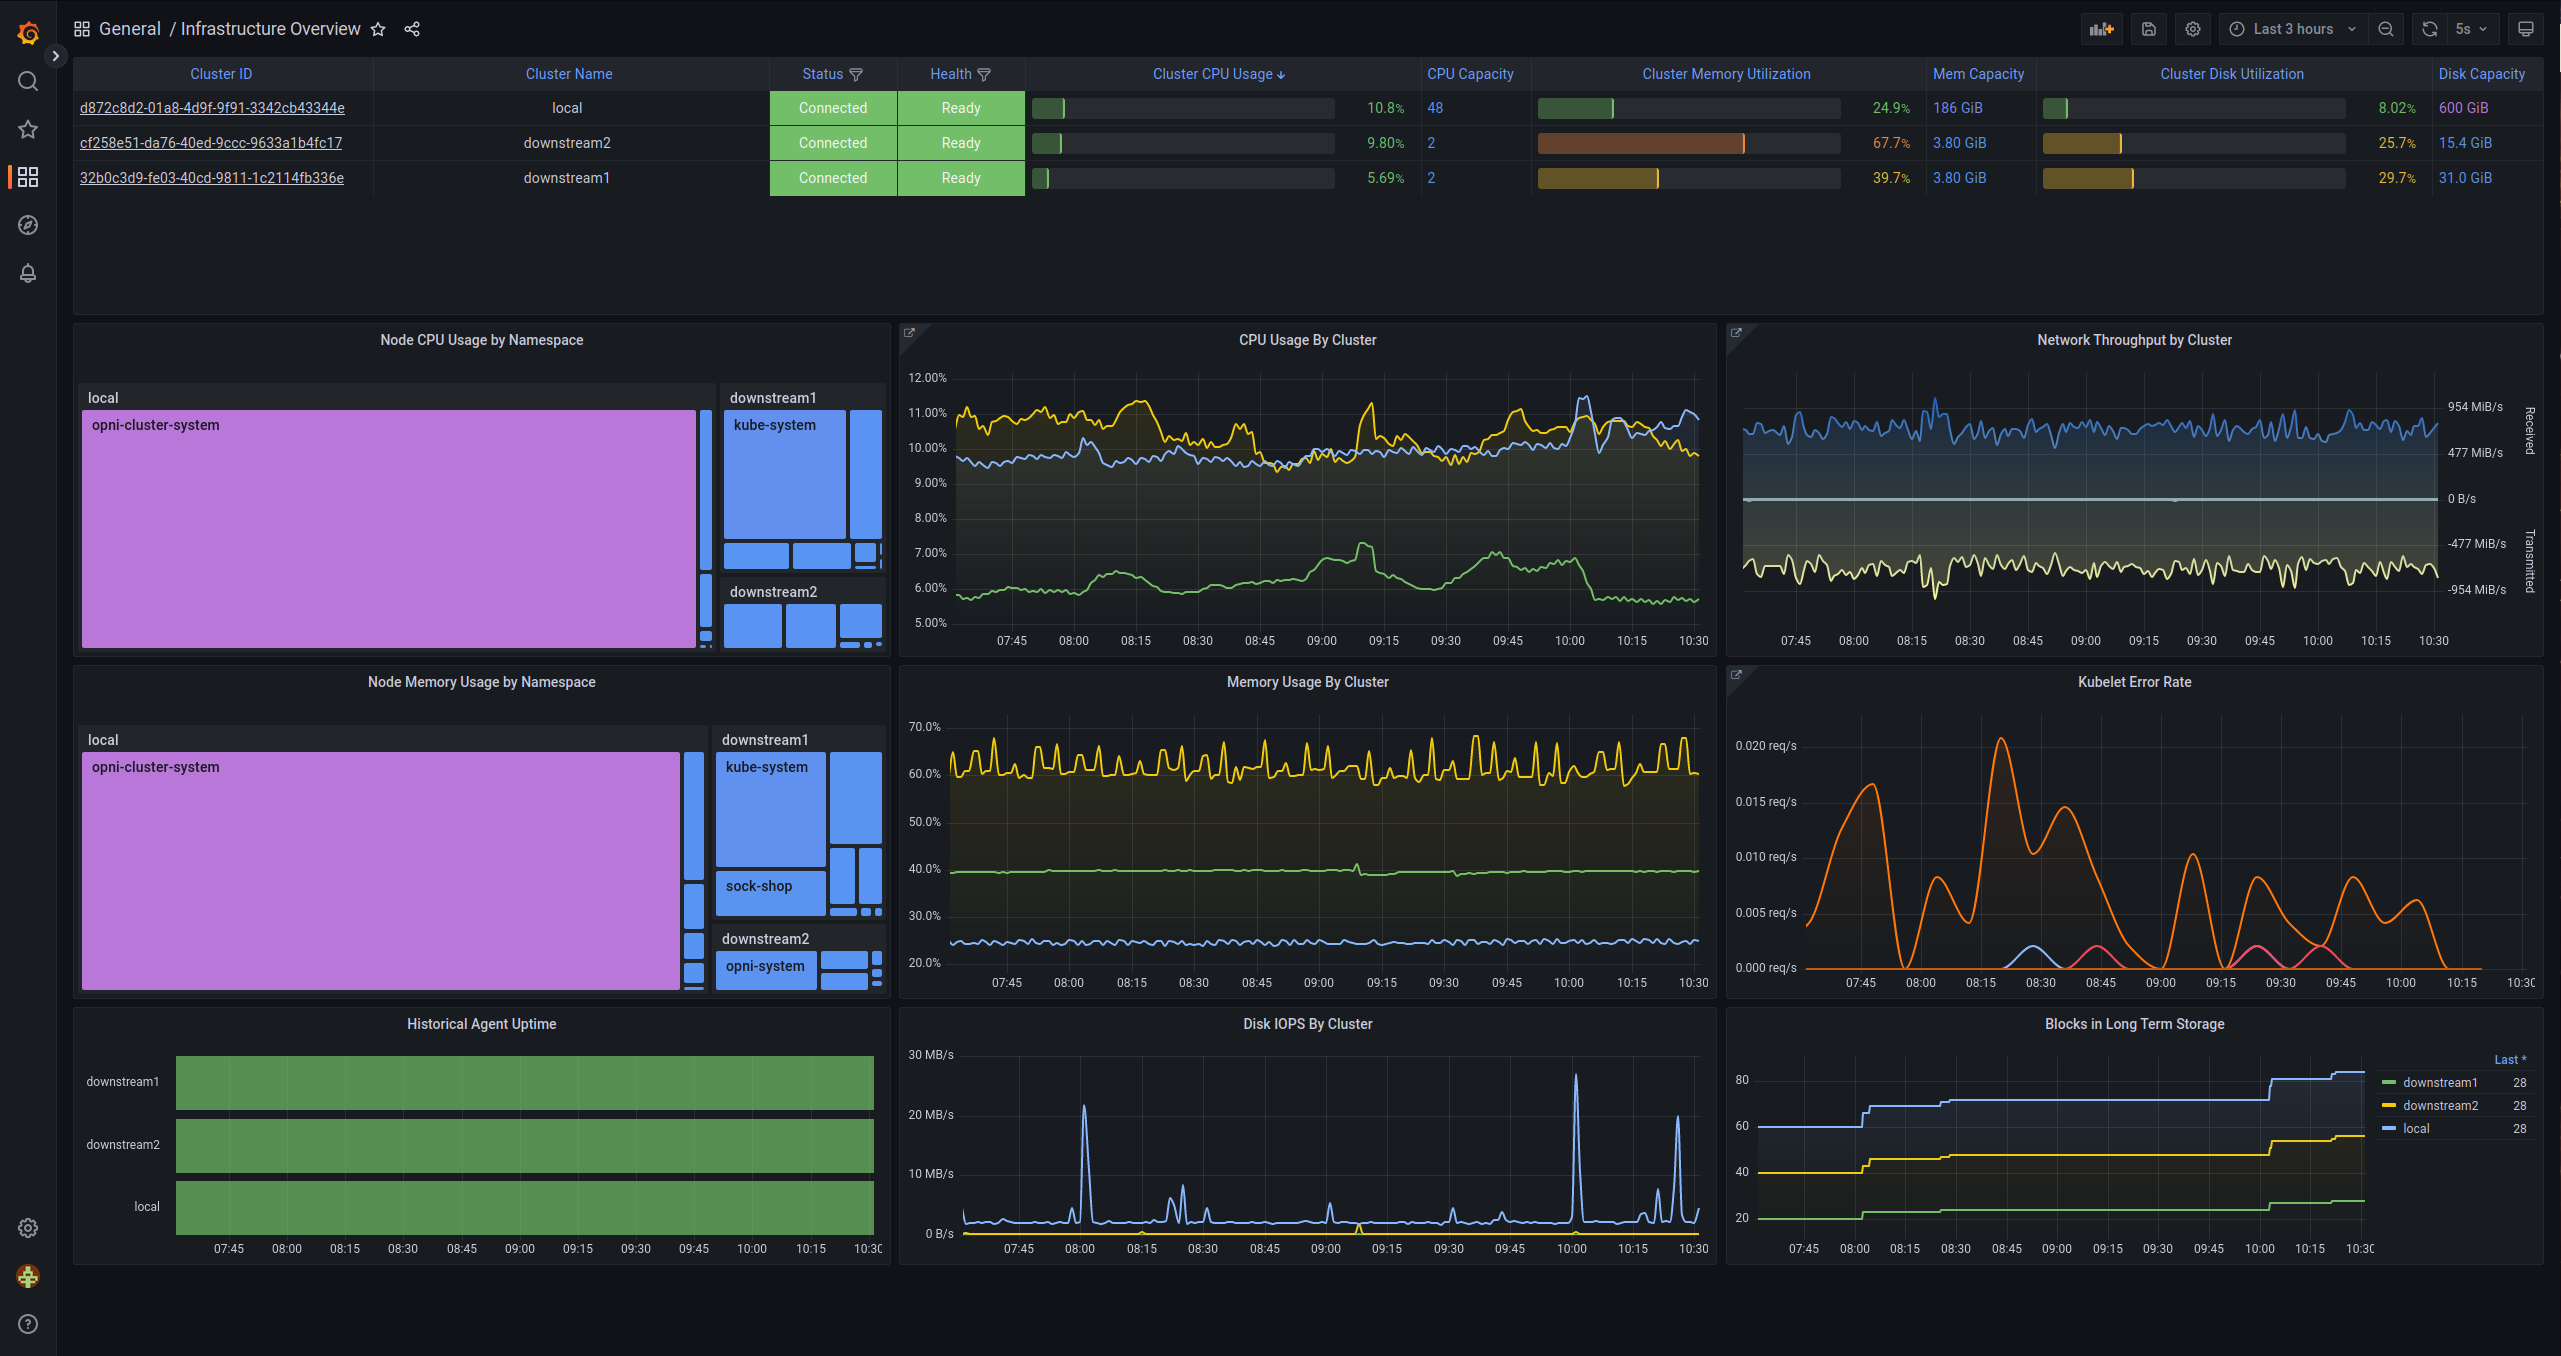
Once Grafana is enabled, access it in the browser to view the Opni dashboards. Several pre-configured dashboards are available.
Using the CLI
Opening a shell into the Opni Gateway pod will give you access to an auto-configured CLI environment.
kubectl -n opni exec -it deploy/opni-gateway -- sh
The opni metrics ops subcommand can be used to configure the Monitoring backend.
$ opni metrics ops --help
  Cortex cluster setup and config operations

  Available Commands:
    configure           Install or configure a Cortex cluster
    get-configuration   Get the current Cortex cluster configuration
    status              Cortex cluster status
    uninstall           Uninstall a Cortex cluster
Usage of the configure subcommand
$ opni metrics ops configure --help
Install or configure a Cortex cluster. If the cluster is already installed, this command will update the cluster
configuration.
Some fields contain secrets. You may provide the placeholder value *** to keep an existing secret when
updating the cluster configuration.

Options:
    --grafana=true:
        Enable Grafana

    --grafana-hostname='':
        Grafana hostname

    --mode='':
        Deployment mode (one of: AllInOne, HighlyAvailable)

    --storage.azure.account-key='':
        [secret] Azure storage account key

    --storage.azure.account-name='':
        Azure storage account name

    --storage.azure.container-name='':
        Azure storage container name

    --storage.azure.endpoint-suffix='':
        Azure storage endpoint suffix without schema. The account name will be prefixed to this value to create the
        FQDN

    --storage.azure.expect-continue-timeout=1s:
        The time to wait for a server's first response headers after fully writing the request headers if the request
        has an Expect header. 0 to send the request body immediately.

    --storage.azure.http.idle-conn-timeout=1m30s:
        The time an idle connection will remain idle before closing.

    --storage.azure.http.insecure-skip-verify=false:
        If the client connects via HTTPS and this option is enabled, the client will accept any certificate and
        hostname.

    --storage.azure.http.response-header-timeout=2m0s:
        The amount of time the client will wait for a servers response headers.

    --storage.azure.max-connections-per-host=0:
        Maximum number of connections per host. 0 means no limit.

    --storage.azure.max-idle-connections=100:
        Maximum number of idle (keep-alive) connections across all hosts. 0 means no limit.

    --storage.azure.max-idle-connections-per-host=100:
        Maximum number of idle (keep-alive) connections to keep per-host. If 0, a built-in default value is used.

    --storage.azure.max-retries=20:
        Number of retries for recoverable errors

    --storage.azure.msi-resource='':
        [secret] Azure storage MSI resource. Either this or account key must be set.

    --storage.azure.tls-handshake-timeout=10s:
        Maximum time to wait for a TLS handshake. 0 means no limit.

    --storage.azure.user-assigned-id='':
        Azure storage MSI resource managed identity client Id. If not supplied system assigned identity is used

    --storage.backend='':
        Backend storage to use. Supported backends are: s3, gcs, azure, swift, filesystem.

    --storage.filesystem.dir='/data':
        Local filesystem storage directory.

    --storage.gcs.bucket-name='':
        GCS bucket name

    --storage.gcs.service-account='':
        [secret] JSON representing either a Google Developers Console client_credentials.json file or a
        Google Developers service account key file. If empty, fallback to Google default logic.

    --storage.retention-period=0s:
        Delete blocks containing samples older than the specified retention period. 0 to disable

    --storage.s3.access-key-id='':
        S3 access key ID

    --storage.s3.bucket-name='':
        S3 bucket name

    --storage.s3.endpoint='':
        The S3 bucket endpoint. It could be an AWS S3 endpoint listed at
        https://docs.aws.amazon.com/general/latest/gr/s3.html or the address of an S3-compatible service in
        hostname:port format.

    --storage.s3.expect-continue-timeout=1s:
        The time to wait for a server's first response headers after fully writing the request headers if the request
        has an Expect header. 0 to send the request body immediately.

    --storage.s3.http.idle-conn-timeout=1m30s:
        The time an idle connection will remain idle before closing.

    --storage.s3.http.insecure-skip-verify=false:
        If the client connects via HTTPS and this option is enabled, the client will accept any certificate and
        hostname.

    --storage.s3.http.response-header-timeout=2m0s:
        The amount of time the client will wait for a servers response headers.

    --storage.s3.insecure=false:
        If enabled, use http:// for the S3 endpoint instead of https://. This could be useful in local dev/test
        environments while using an S3-compatible backend storage, like Minio.

    --storage.s3.max-connections-per-host=0:
        Maximum number of connections per host. 0 means no limit.

    --storage.s3.max-idle-connections=100:
        Maximum number of idle (keep-alive) connections across all hosts. 0 means no limit.

    --storage.s3.max-idle-connections-per-host=100:
        Maximum number of idle (keep-alive) connections to keep per-host. If 0, a built-in default value is used.

    --storage.s3.region='':
        S3 region. If unset, the client will issue a S3 GetBucketLocation API call to autodetect it.

    --storage.s3.secret-access-key='':
        [secret] S3 secret access key

    --storage.s3.signature-version='v4':
        The signature version to use for authenticating against S3. Supported values are: v4, v2.

    --storage.s3.sse.kms-encryption-context='':
        [secret] KMS Encryption Context used for object encryption. It expects JSON formatted string.

    --storage.s3.sse.kms-key-id='':
        KMS Key ID used to encrypt objects in S3

    --storage.s3.sse.type='':
        Enable AWS Server Side Encryption. Supported values: SSE-KMS, SSE-S3.

    --storage.s3.tls-handshake-timeout=10s:
        Maximum time to wait for a TLS handshake. 0 means no limit.

    --storage.swift.auth-url='':
        OpenStack Swift authentication URL

    --storage.swift.auth-version=0:
        OpenStack Swift authentication API version. 0 to autodetect.

    --storage.swift.connect-timeout=10s:
        Time after which a connection attempt is aborted.

    --storage.swift.container-name='':
        Name of the OpenStack Swift container to put chunks in.

    --storage.swift.domain-id='':
        OpenStack Swift user's domain ID.

    --storage.swift.domain-name='':
        OpenStack Swift user's domain name.

    --storage.swift.max-retries=3:
        Max retries on requests error.

    --storage.swift.password='':
        [secret] OpenStack Swift API key.

    --storage.swift.project-domain-id='':
        ID of the OpenStack Swift project's domain (v3 auth only), only needed if it differs the from user domain.

    --storage.swift.project-domain-name='':
        Name of the OpenStack Swift project's domain (v3 auth only), only needed if it differs from the user domain.

    --storage.swift.project-id='':
        OpenStack Swift project ID (v2,v3 auth only).

    --storage.swift.project-name='':
        OpenStack Swift project name (v2,v3 auth only).

    --storage.swift.region-name='':
        OpenStack Swift Region to use (v2,v3 auth only).

    --storage.swift.request-timeout=5s:
        Time after which an idle request is aborted. The timeout watchdog is reset each time some data is received, so
        the timeout triggers after X time no data is received on a request.

    --storage.swift.user-domain-id='':
        OpenStack Swift user's domain ID.

    --storage.swift.user-domain-name='':
        OpenStack Swift user's domain name.

    --storage.swift.user-id='':
        OpenStack Swift user ID.

    --storage.swift.username='':
        OpenStack Swift username.
    --disable-usage=false:
        Disable anonymous Opni usage tracking.

Usage:
  opni metrics ops configure [flags] [options]
The configure and uninstall subcommands can be given the --follow option to watch the progress of the operation in real time.
Experimental Features
Using the CLI, you can configure storage backends for Azure, GCS, and Swift, in addition to the ones available in the UI. These backends are not tested as thoroughly as the S3 backend, and may or may not work correctly.
When using the CLI to configure the Swift backend (using --storage.backend=swift), the standard Openstack environment variables will be used to populate unset options. The --storage.swift.container-name flag will still be required.
Access Control
Opni Monitoring uses Role Based Access Control (RBAC) to control which clusters a given user is allowed to see. If you are familiar with RBAC in Kubernetes, it works the same way.
In Kubernetes, RBAC rules are used to determine which API resources a given User or Service Account is allowed to access. Similarly, in Opni Monitoring, RBAC rules are used to determine which clusters a user has access to. When a user makes an authenticated query, the system will evaluate the current RBAC rules for that user and determine which clusters to consider when running the query.
Labels
Clusters in Opni Monitoring have an opaque ID and can have a number of key-value labels. Labels are the primary means of identifying clusters for access control purposes. Labels in Opni Monitoring are functionally similar to labels in Kubernetes, and follow these rules:
Labels must have unique keys, and there is a one-to-one mapping between keys and values.
Labels cannot have empty keys or values
Label keys must match the following regular expression:
^[a-zA-Z0-9][a-zA-Z0-9-_./]{0,63}$Label values must match the following regular expression:
^[a-zA-Z0-9][a-zA-Z0-9-_.]{0,63}$
Roles
A role is a named object representing a set of permissions. It contains rules that match clusters by ID or by the cluster's labels. A role can use any/all of the following matchers:
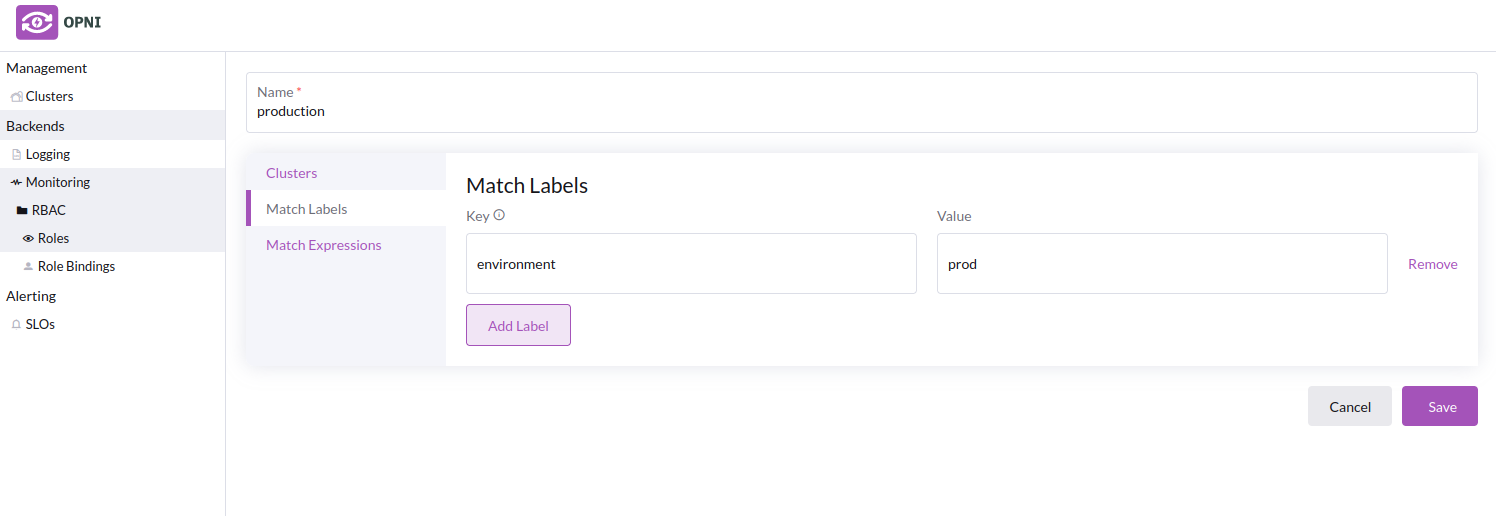
1. Label Matchers
A role can match clusters by specifying an explicit key=value label pair that will match a single label with the exact key and value specified. No partial matching or globbing is performed.
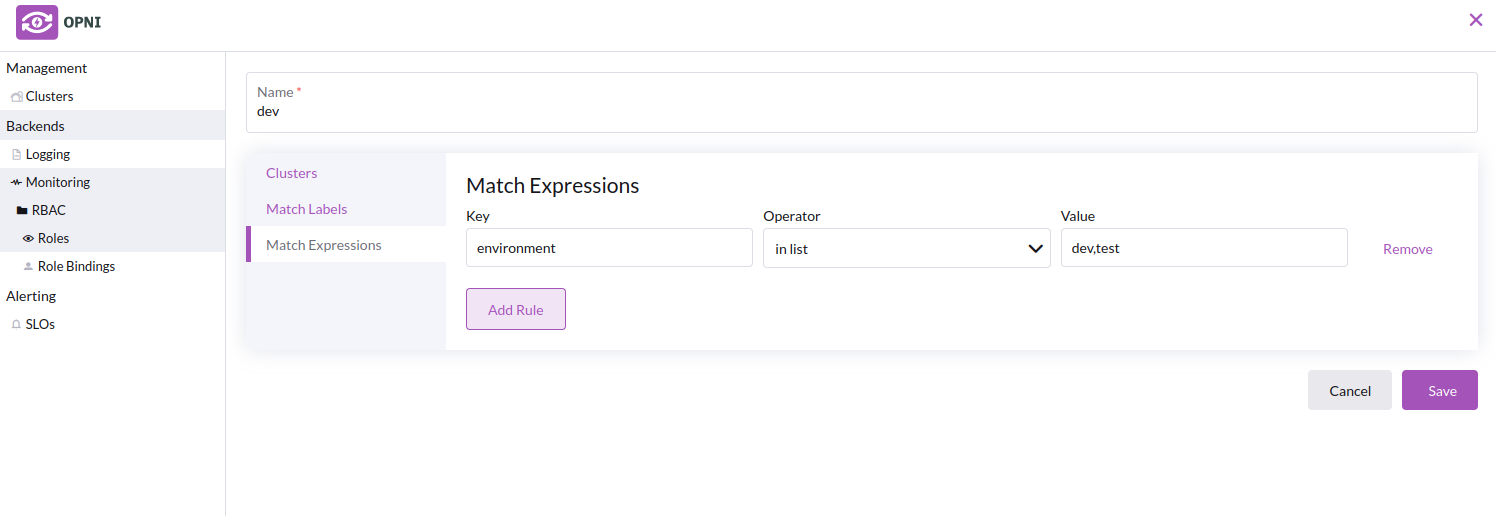
2. Label Selector Expressions
A role can also match clusters by using a Kubernetes-style label selector. These selectors are more versatile, and can match labels using a variety of rules, such as:
- Matching if a given key exists
- Matching if a given key does not exist
- Matching if the value for a given key is in a list of allowed values
- Matching if the value for a given key is not in a list of allowed values
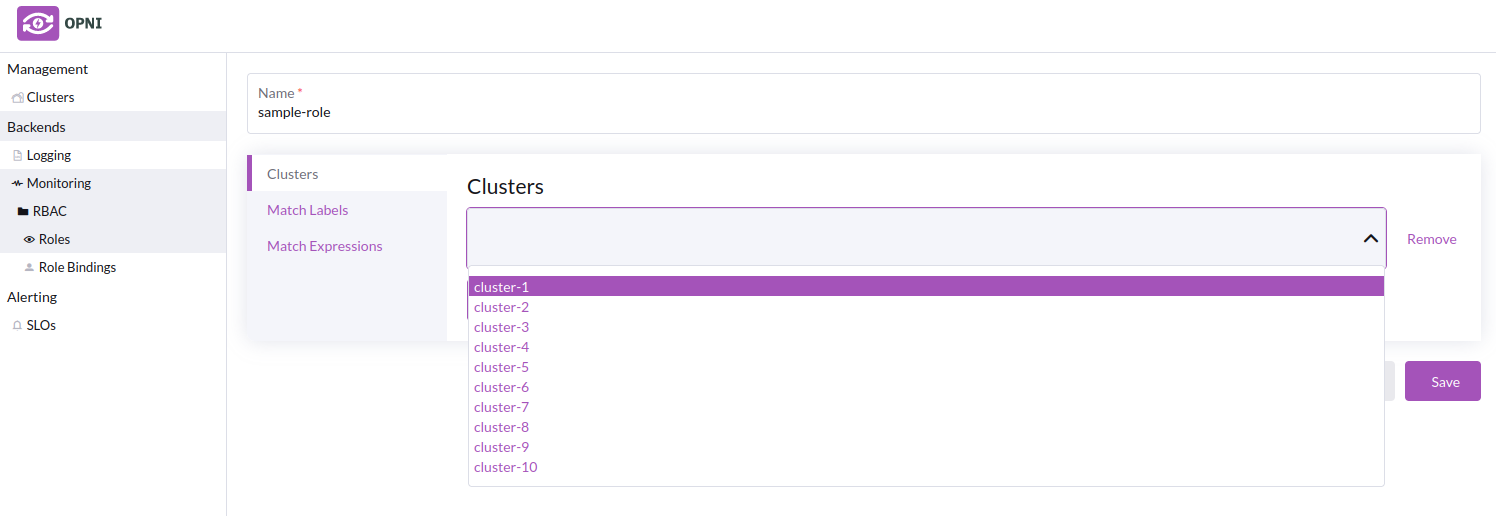
3. Explicit Cluster IDs
Clusters can also be explicitly added to a role by ID. It is not recommended to use explicit cluster IDs as a primary means of access control, but they can be useful in situations where you want to add an exception to an existing role or a temporary override. Label-based selectors are much more flexible, and should be preferred in general.
Role Bindings
A role binding is a named object that attaches one or more users ("subjects") to a role. When evaluating RBAC rules for a given user, the system will look up all role bindings attached to that user, then use the union of the associated roles to determine which clusters the user is allowed to see.
Configuring Roles and Role Bindings
Using the Opni Dashboard
Roles and Role Bindings can be configured in the RBAC section under Monitoring in the left sidebar.
Creating Roles
On the Roles page, click the Create Role button. Give the role a unique name, then add clusters by ID, or by label selector. Existing clusters will be listed in the dropdown menu when adding clusters by ID to the role.
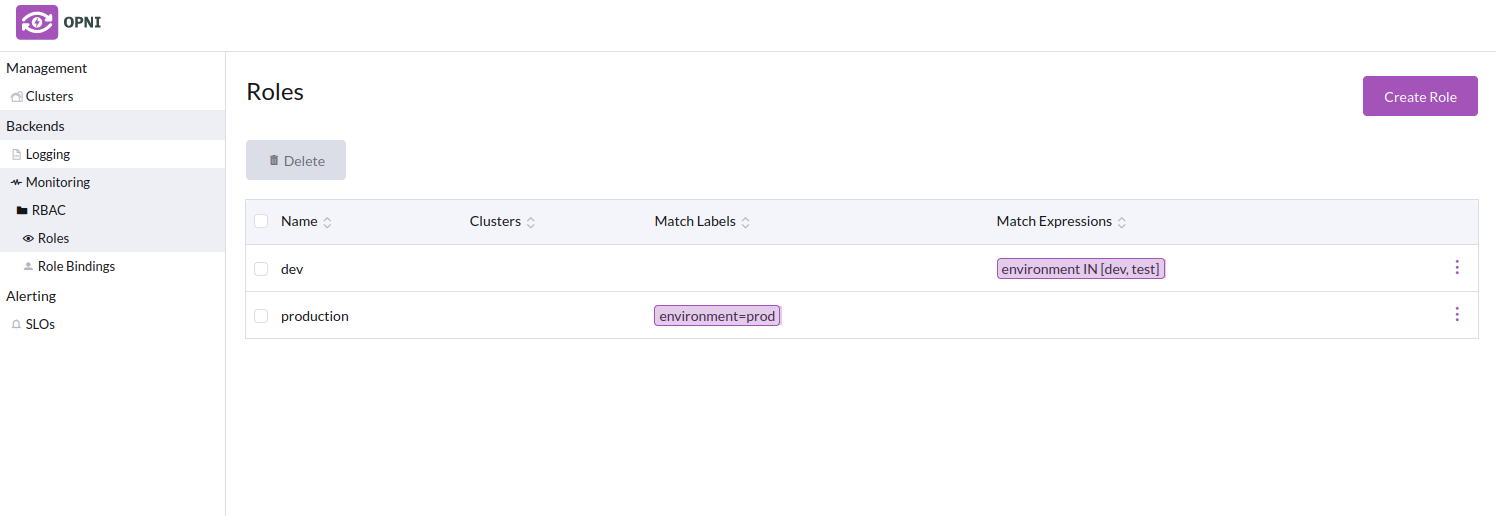
Example Roles
In this example, we will create roles for two different environments, one for "prod" and one for "dev/test", which we will separate our clusters into using labels.
- Creating the "production" role
- Creating the "dev" role
- Roles list with the new roles
Creating Role Bindings
To create a role binding, navigate to the Role Bindings page in the sidebar.
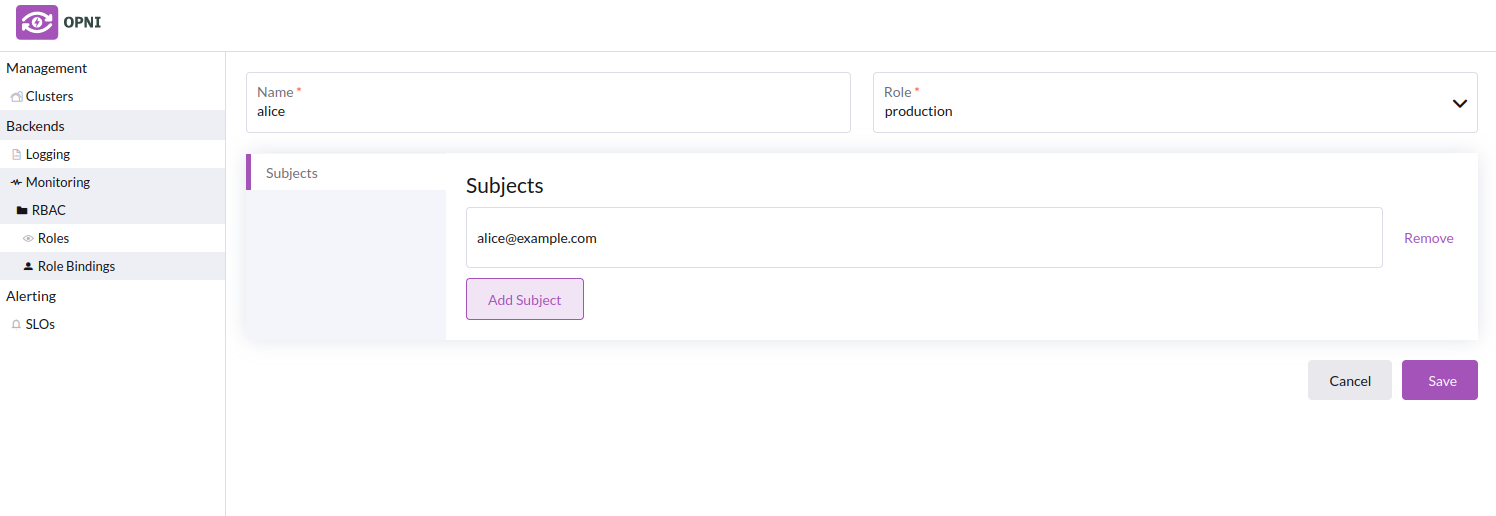
On the Role Bindings page, Click the Create Role Binding button. Give the role binding a unique name, select an existing role to attach to the binding. then add subjects (users) to whom the role will be applied. The value used to identify a user depends on the identifyingClaim configured in the Gateway's OAuth settings. For example, if your identifyingClaim is email, subjects are identified by email address. Check your OAuth provider's documentation to determine which identifyingClaim you should use.
Example Role Bindings
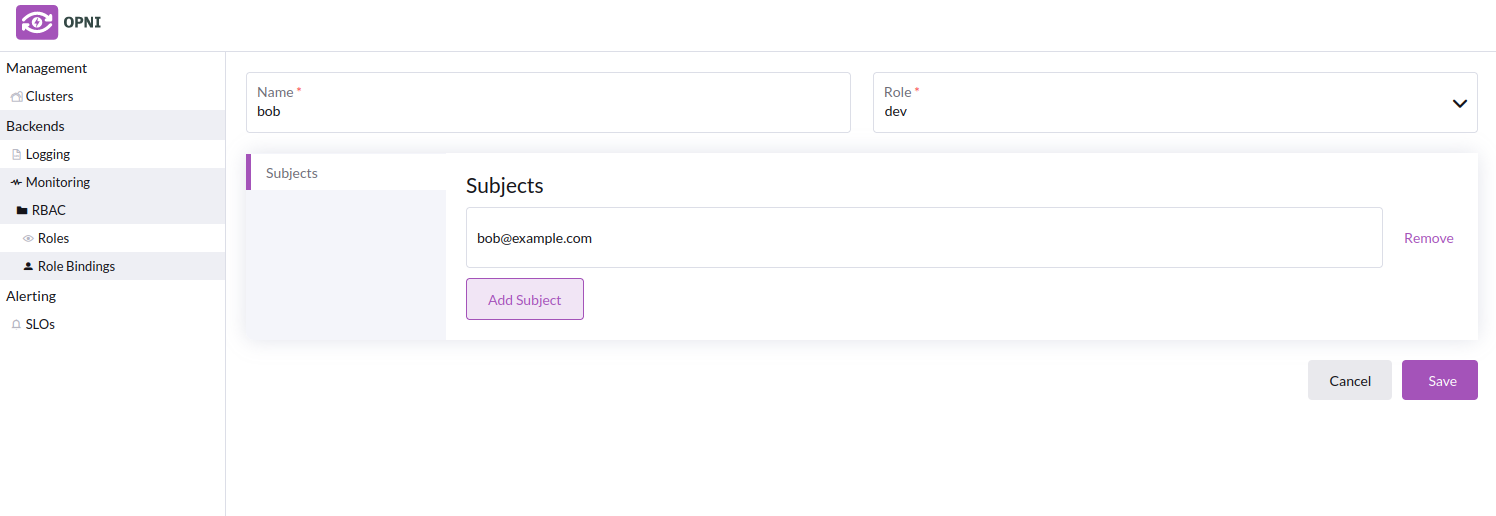
Following the example above, we will create role bindings for two users, one for each role.
- Creating a role binding for a "production" user
- Creating a role binding for a "dev" user
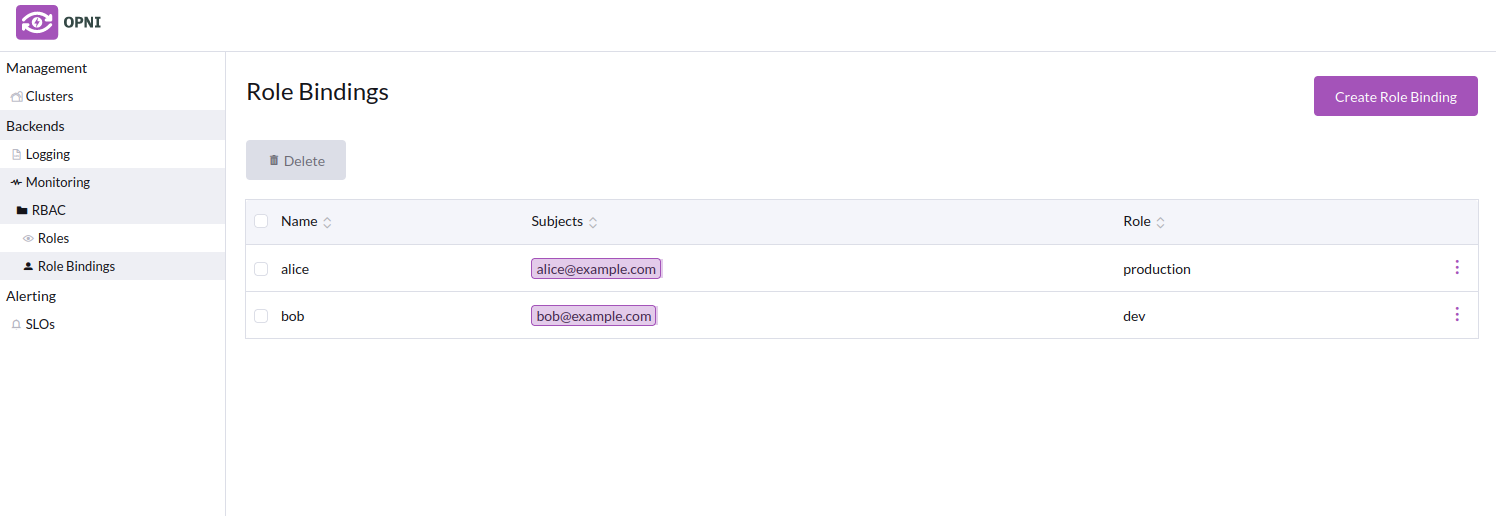
- Role bindings list with the new role bindings
Labeling Clusters for Access Control
To label a cluster, navigate to the Clusters page in the sidebar. Right-click on the cluster you want to label, then select Edit. Add labels to the cluster, then click Save.
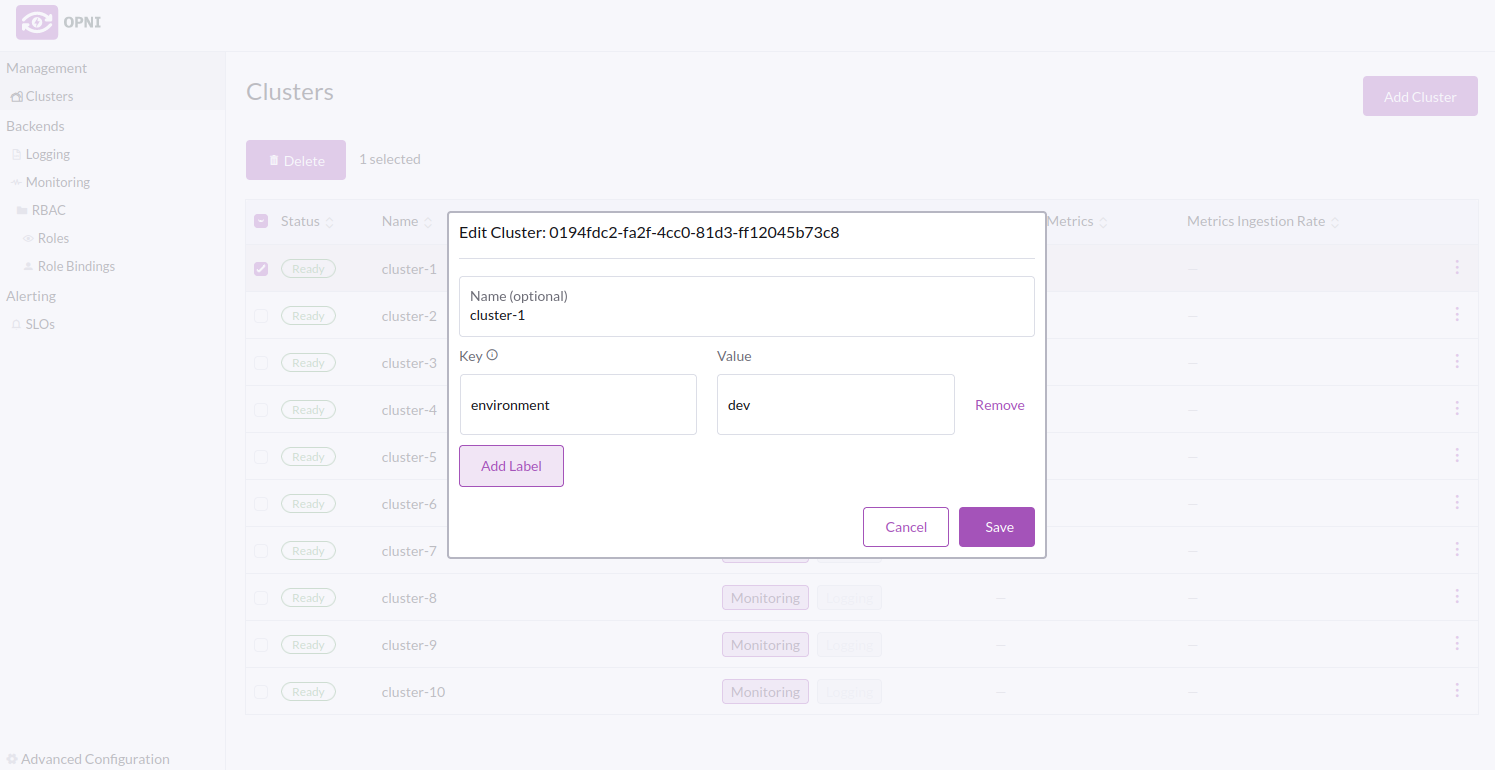
Example labels
In this example, we will label our clusters with the environment they are in, "prod", "dev", or "test".
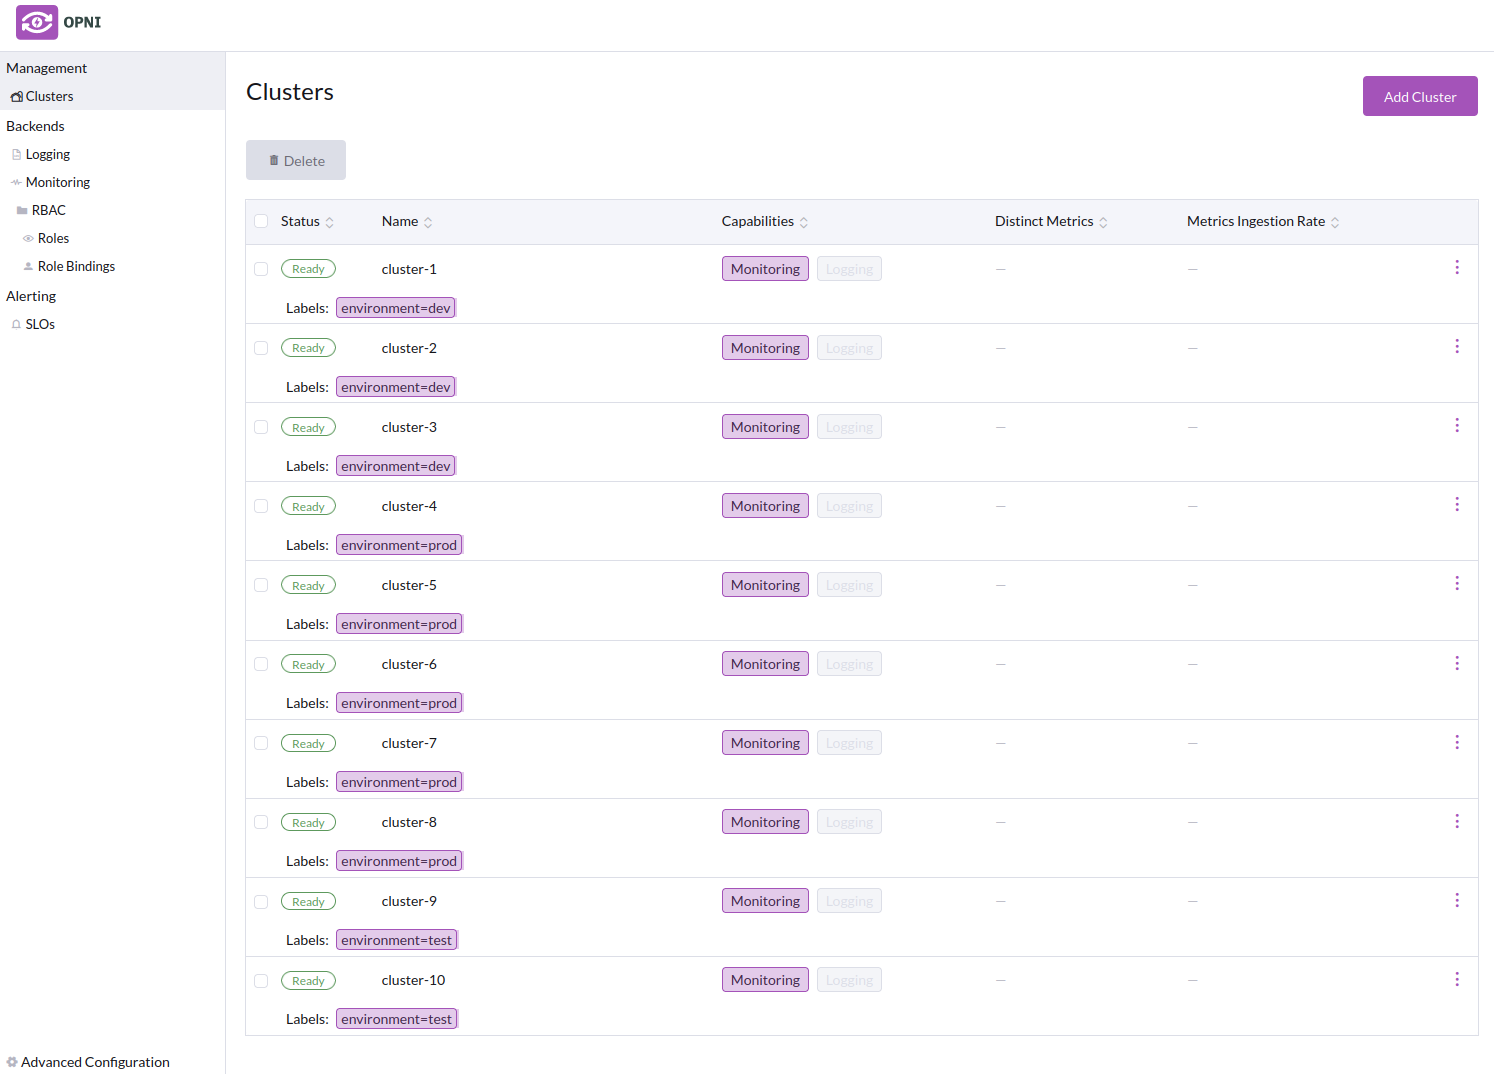
When a user logs in to Grafana via OAuth, they will only see the clusters they have access to. In this example, Alice will only see the "prod" clusters (4, 5, 6, 7, 8), and Bob will only see the "dev" (1, 2, 3) and "test" (9, 10) clusters.
The opni access-matrix CLI command will print the access matrix of all users and clusters.
$ opni access-matrix

               TENANT ID               alice@example.com  bob@example.com
 0194fdc2-fa2f-4cc0-81d3-ff12045b73c8          ❌                ✅
 32f3a8ae-b79e-4856-b659-c18f0dcecc77          ❌                ✅
 6e4ff95f-f662-45ee-a82a-bdf44a2d0b75          ❌                ✅
 8bcb9ef2-d4a6-4314-b68d-6d299761ea9e          ✅                ❌
 a178892e-e285-4ce1-9114-55780875d64e          ✅                ❌
 c75e7a81-bfde-475f-a7cf-e242cf3cc354          ✅                ❌
 e2d3d0d0-de6b-48f9-b44c-e85ff044c6b1          ✅                ❌
 f3ede2d6-becc-4ea3-ae5e-88526a9f4a57          ✅                ❌
 f83b8e88-3bbf-457a-ab99-c5b252c7429c          ❌                ✅
 fb180daf-48a7-4ee0-b10d-394651850fd4          ❌                ✅
Using the CLI
Roles and Role Bindings can be managed using the CLI.
Usage of the opni roles command:
$ opni roles --help
Manage roles

Aliases:
roles, role

Available Commands:
  create        Create a role
  delete        Delete roles
  list          List roles
  show          Show detailed information about a role
Usage of the opni rolebindings command:
$ opni rolebindings --help
Manage role bindings

Aliases:
rolebindings, rb, rolebinding

Available Commands:
  create        Create a role binding
  delete        Delete a role binding
  list          List role bindings
  show          Show detailed information about a role binding
Example Usage
Listing roles and role bindings from the above example:
$ opni roles list
 ID          SELECTOR                  CLUSTER IDS
 dev         environment ∈ {dev,test}  (none)
 production  environment ∈ {prod}      (none)

$ opni rolebindings list
 ID     ROLE ID     SUBJECTS
 alice  production  alice@example.com
 bob    dev         bob@example.com
Deleting and Creating a role:
$ opni roles delete production
production

$ opni roles list
 ID   SELECTOR                  CLUSTER IDS
 dev  environment ∈ {dev,test}  (none)

$ opni roles create production --match-labels 'environment=prod'
 ID          SELECTOR              CLUSTER IDS
 production  environment ∈ {prod}  (none)

$ opni roles list
 ID          SELECTOR                  CLUSTER IDS
 dev         environment ∈ {dev,test}  (none)
 production  environment ∈ {prod}      (none)
The CLI does not yet support creating roles with label expression matching, only simple label matching.
External URL
This is the URL that the Opensearch API will be exposed on, e.g https://opensearch.example.com. You will need to manually expose this URL using either an Ingress or Load Balancer service.
In some cases it might be simpler to access the Opensarch dashboard with a port-forward
kubectl -n opni port-forward svc/opni-opensearch-svc-dashboards 5601:5601
Data Retention
This is how long logs will be retained for. The default is 7 days (7d). This can be extended if required, for example 6 months (6m) or 1 year (1y).
Node Pool configuration
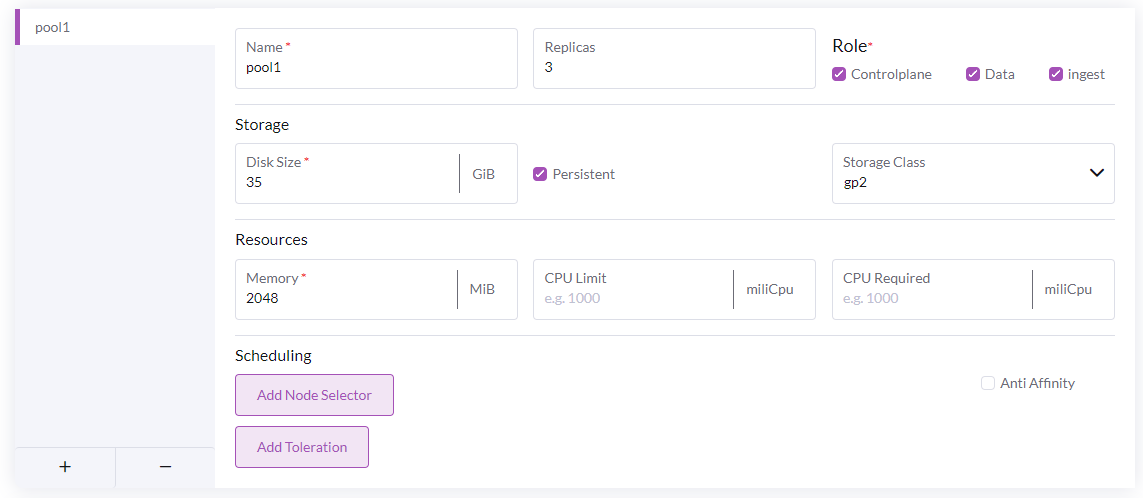
This is where the Opensearch node pools are configured. All three roles (controlplane, data, ingest) are required in the cluster but can be spread across multiple node pools.
The roles are as follows:
- Controlplane - manages leader elections for the cluster
- Data - stores the cluster data and runs indexing and search operations
- Ingest - runs ingest pipelines; Opni uses ingest pipelines to set up the data for AI operations.
For large clusters it is recommended to separate the roles. In particular the controlplane nodes should be separated to avoid resource contention affecting the leader elections. There should always be an odd number of controlplane nodes.
In most cases, you will want to deploy at least 3 Controlpane to ensure there will be at least one master for the Opensearch cluster.
Dashboards configuration.
Click enable to install Opensearch Dashboards. This provides a UI for Opensearch and Opni AIOps.

Accessing Opensearch Dashboards
Once the Opensearch cluster is reported as ready, you can access the dashboards. Opni will create an admin user that must be used to log in to the dashboards. The username and password admin credentials can be obtained from the opni-admin-password secret.
Username
kubectl get secret -n opni opni-admin-password -o jsonpath='{.data.username}' | base64 -d
Password
kubectl get secret -n opni opni-admin-password -o jsonpath='{.data.password}' | base64 -d
It is recommended that you change the password on this user.
The Alerting backend is composed of an AlertManager statefulset, fully managed by Opni. You can enable and configure Monitoring from the Opni dashboard, or from the CLI.
Using the Opni Dashboard
Follow these steps to enable Monitoring from the Opni dashboard:
- Navigate to the Opni dashboard
To access the dashboard, you can port-forward:
kubectl -n opni port-forward svc/opni-admin-dashboard web:web
Then navigate to http://localhost:12080.
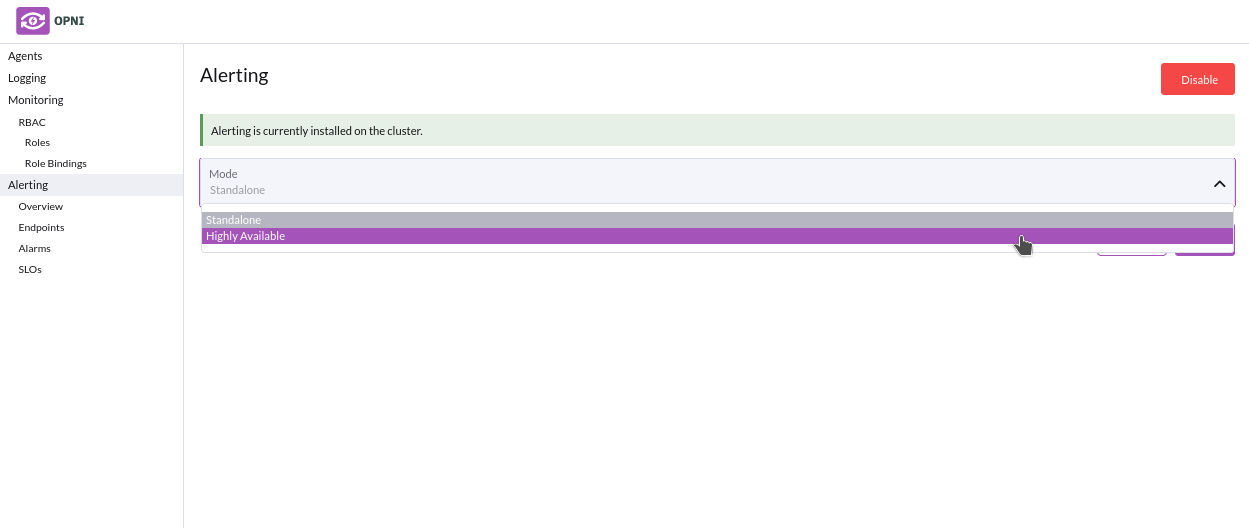
Select "Alerting" from the left sidebar then click enable to install
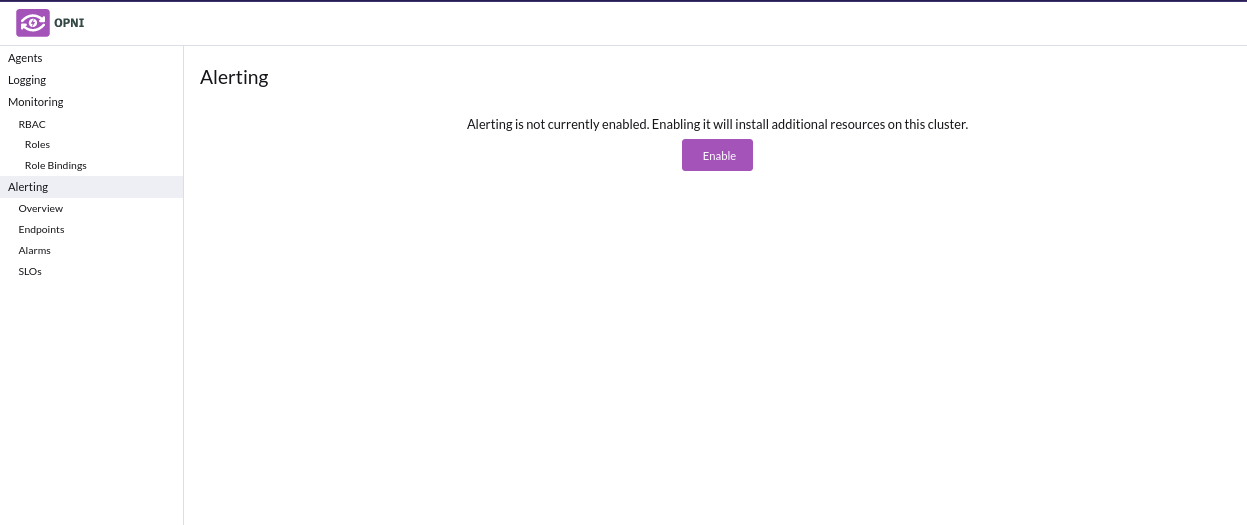
Alerting backend can sometimes erroneously show a "no changes to apply" error when installing, however this does not impact functionality
- Choose between deploying the opni-cluster as standalone or HA: